Carletta Trains
NJ Transit GP40FH-2 Loco 1
A GP40PH-2 is the front of a GP40 asnd the cowl of an F45. The tough part is that it's not the length of an F45 so the shell had to be shortened by removing a center section of the cowl. Below are the steps I went through to create it.


In order to get the shell to fit on the smaller GP40 frame I had to remove the portion highlighted in red. I would then need to join the two halves together along with a few other modifications.


As you can see from the pictures above, the F45 only has 3 fans at the back, but my model needs 4 fans. I went to the duplicatre model and removed one of its fan housings. I then sanded the back of my model and gluied it on. It's a little tight, but it gives the wanted appearance.


Here you can see how I used strips of styrene to join the two halves


Time to join the two halves

Next I used White Squadron putty to fill the seam and level out the roof. This required a fair amount of sanding to make it nice and smooth and flush


Here I'm test fitting the newly fused shell with the chasis. You can also see how I filled in the windows on the doors that aren't on the GP40FH-2. It was a perfect fit


Next I installed brass detail and wired it with fiber optics so there will be red marker lights when it's in reverse. More on that later.

Now it's time to paint, apply decals, and add more detail parts


High voltage decal up close


I used a thin piece of styrene to keep these handrails away from the body


I cut grooves in the bottom to help secure the railing
More detail pieces were separately applied
Holes drilled for railing


Here you can see where I hollowed out the vent here and installed a mesh grill. I did this so that the sound decoder could be heard better.

Now it's time for the custom lighting
When the trains re in "push" mode (going in reverse)the red marker lights in the front of the locomotive are on. The problem with most decoders is that the lights are only on in the direction t\he loco is going. If it's going forward the front light is on and if it's going in reverse the back light is on. I solved my problem using fiber optics.
First I glued a piece of styrene with two grooves in it just above the back light.


In this picture you can see the fiber optic cable running through the grooves I made and bent down facing the LED.
I bent the cable by holding it over a hot soldering iron and letting the heat melt the cable just enough to bend it without breaking it.
Fiber optics work in such a way that the light never exits the side of the cable which allows the light to travel through all the bends and shine at the other end.

Here's the unit assembled and you can see the light at the end of the fiber optic cable as the loco is set to run in reverse.
Right now it looks like it has whiskers so the next strep is to trim them down sand tint them red.

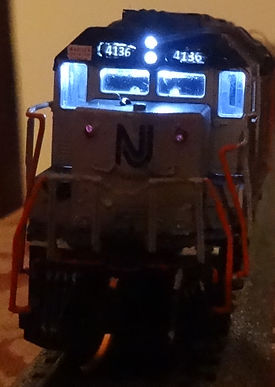
Here's the final product where the red marker lights light up when the locomotive is in reverse. I did this same thing on my GP40PH-2 with great success.


The Finished Model


